I have always been interested in curing meats as they do with hams, but was just never around anyone that did it. That is why I started building the smokehouse last year. I wanted to try curing with deer after we butcher them and maybe even try it with other meats. I have always considered waterfowl my “fun” meats to do anything with. It was not normally for meals, but was used for jerky and snack sticks.
The first thing I did was to clean up and remove the bone from the deer shoulder. I started with removing the membrane from the outside of the shoulder. It covers the meat and then goes down between muscle groups. It could prevent cure penetration and should come off. I trimmed it off the top and cut it to where it slipped in between the muscle groups. Then I cut the leg bones out and this is one of the hardest pieces on a deer to de-bone and still keep whole, just my opinion.

Below is the deer shoulder with the bone out and laying next to the meat in the presentation of how it came out. The scapula is the hard part to trim around as it is the T bone in the shoulder when cut.

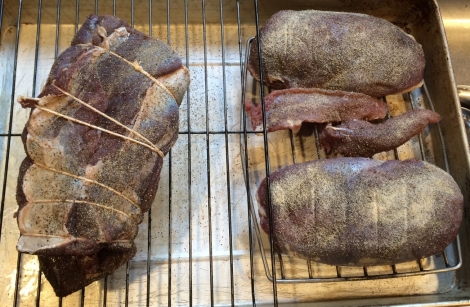
Both sets of meat ready to get the cure mixture. That is the goose breast on the right and the thin piece at the top is the fish, or tenderloin, small muscle that sits under the main muscle.

No pictures of this, but I used TenderQuick this time for cure instead of messing with mixing my own cures. I figured I better stay standard until I learn how to do it. I used 1 tablespoon of TenderQuick and 1 Tablespoon of brown sugar per pound of meat. Each piece is weighed and the ingredients mixed on a paper plate. The hand rubbed all over the meat and each piece put in its own bag. Make sure to get all the cure and sugar crumbs left over from each piece into its bag. It will soak up every piece of salt and sugar in a day. I followed the recipe of BearCarver on the smokingmeats forum. You can read his post here and see his recipe. I cured the meat for 10 days as the the deer was 1 3/4″ think. Below is the formula he said is the tried and true to timing of the curing.
I go by a formula I learned here 7 years ago:
2 Days for every 1/2″ (thickness), Plus 2 Days.
Then I add another 2 or 3 days to that. (whichever suits my schedule best)
So after being cured the meat was brought up and removed from the bags and washed. I thought about soaking the goose as I over cured it, but I just left it be. My wife does not like salty food, but I figured she would not want the goose any way, so didn’t worry about it. Then I tied the deer roast with cotton twine and and covered everything with spices. I used black pepper, onion and garlic powder. The deer was done first which makes it look like it didn’t get enough as it was getting a little wet and the spices didn’t photograph as well. I think I might put even more on next time as after slicing its not much spice on the meat with just the outside.
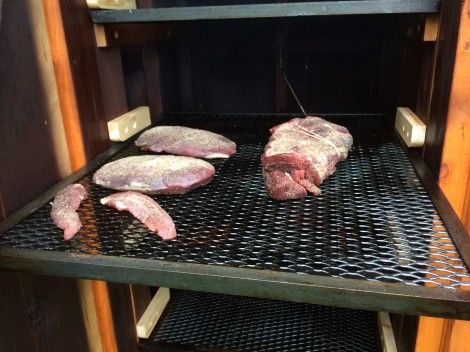
Then back down into the basement fridge to rest for smoking the next day.
Here they are going in the smokehouse. They look really lonely, don’t they? There is three empty trays and I’m not even close to filling one tray up. I could put an entire deer in there, and just might later this year. 😀
Started out low around 120° and stayed below 130° until almost lunch. Smoke flavor sets in at low temperatures and cooking at high temperatures sears the outside keeping juices. We are trying to make “dry” beef, not juicy beef. Slowly got to 160° by 3pm . Then I was taking it to 200° around 4pm to finish it. The wife and I are enjoying a beer and we hear the clang of metal on concrete. My wife says “What was that?” I respond “It sound like my firebox door.” and it was.
I used plastic anchor on the brick and they melted. I had to push the door back up with insulated gloved and put a 12″ square walking stone against it. Air leaked like a sieve and my heat quickly tried to get to 250° and I had little control but how much wood I put on. I need to fix that with either lead anchor or masonry screws, but I haven’t researched that yet.
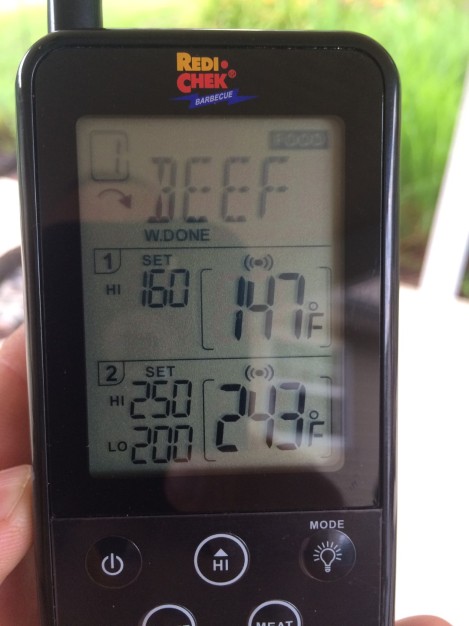
The deer hit 160° and the goose got to 169° and don’t they look good?
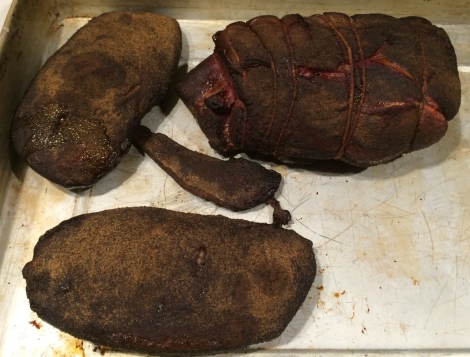
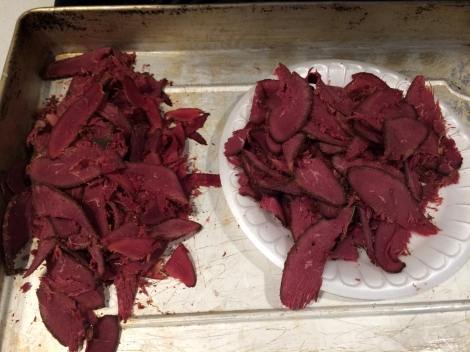
The rested in the fridge over night and got sliced the next day. Below is the two goose breast, each in their own pile. Look at that dark red cure color.
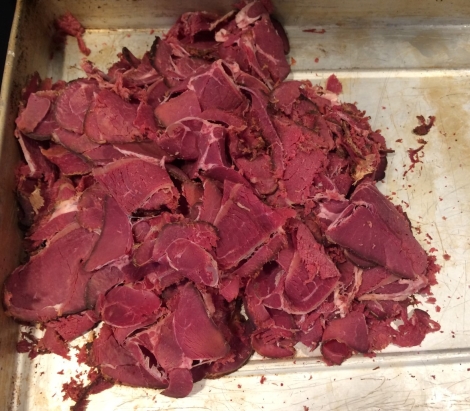
This is the deer shoulder and its more meat and deeper than it appears.
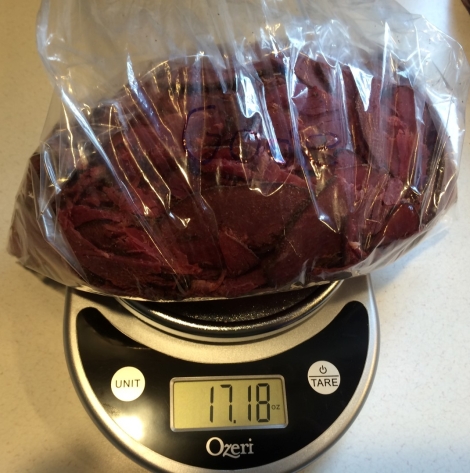
The deer in a bag waiting to be portioned out and vacuum sealed by my wife.
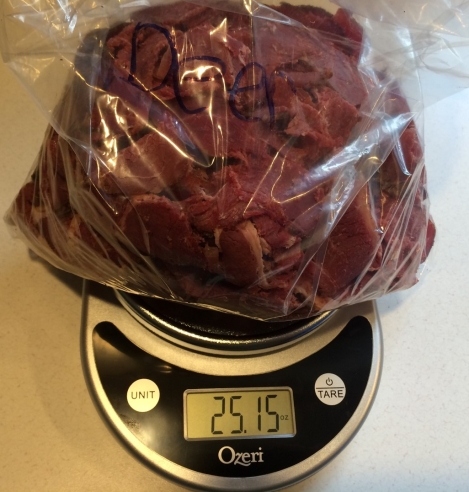
Here is the two goose breasts by weight. I don’t have exact measurements as I got the scale after starting the cure. I think from before curing to after cooking I lost almost 50% weight and the deer was close. Noticeably smaller after cooking, but its cured and tastes just flat out awesome.
I would highly recommend this to anyone that can do any smoking of meat and wants to do their own meat processing. I expect to make much larger batches in the fall and to be eating this with biscuits and gravy too.
My wife actually likes the heavily cured goose over the deer, which astounded me. She said to put more cure on the deer next time. 😀 OK baby, whatever you like is how I will do it next time.
Enjoy!

Pingback: The Smokehouse – Part 2 – Firebox and base | Confessions of a fisherman, hunter and tinkerer·
Pingback: Scrambled eggs with goose pastrami | Confessions of a fisherman, hunter and tinkerer·