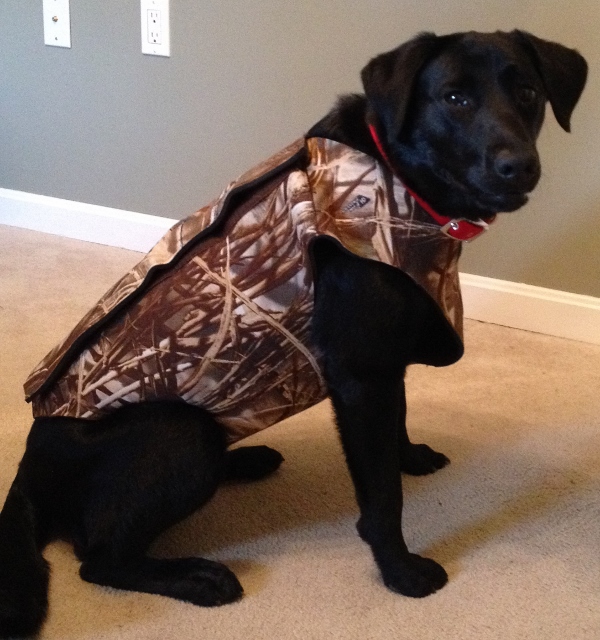
Ever since we got Kako (our Labrador) last august I have been planning on how I am going to take her hunting on the river. She is a half English, half American, field Labrador and a female so she is only cracking the scales at a whopping 55 pounds. That is a huge difference for us from the full sized eastern shore American Labrador we had last time and he weighed in at 95 pounds in his prime. But Kako is no less of a hunting dog and sometimes more aggressive in her retrieving.
This is Kako, in her hunting clothes in my office.
I already have a blind on my Commander 120 for hunting, but bringing a Labrador in and out of a Sit in Side, hybrid kayak several times and you will find quickly that a Labrador can bring in about 1/3, or more, of a gallon of water each time. Several hops in and out for the dog and the side pontoon area in the Commander is full of water right next to the seat. I went out to test this blind one day and took the Commander along for my buddy Ted to test the Ride and the Commander with his dog in the river. By the time we got back to the ramp after the dog training session, Ted and his dog Hunter must have had 3, or more, gallons of water in the Commander. This is not really what you want for winter hunting, which is why I wanted a SOT (Sit on Top) kayak for hunting with a dog.
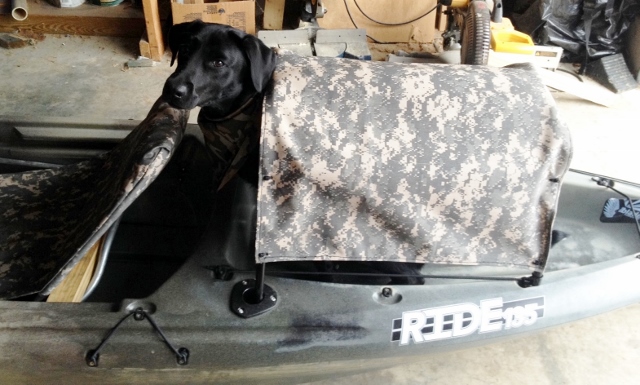
I had a Blue Ocean Kayak with a trolling motor (see previous post) for fishing on the Chesapeake. A blue kayak was not going to work for waterfowl hunting, so I sold it off and bought the Wilderness Systems Ride 135 in Camo. The dog fits perfect in the tankwell and that is how I usually hunt with the stern backed up to some kind of cover and then she is behind me so I don’t have to worry about the shotgun making her deaf in her older years. Plus, when she is in there, she is out of the water and isolated by the air gap of the hull from the water and any water she brings in drains forward, away from her and out of the tankwell. I plan to get her a closed cell pad, but have not found what I want yet.
Now, lets start talking about the build. I have a 1/2″ conduit bender and some experience using it. You can buy one to keep or buy one and return it. 1/2″ conduit has a 5″ take out, meaning you bend a 90 and place the 90 against a wall and measure how far you want the next 90 to end, deduct 5″ and make a mark. Then put the bender on the pipe and line the arrow up with the mark and bend the 90. The 2 90’s will equal the distance you wanted them to be apart. Or, you can buy me beer and show up at my house and I will bend it for you with my bender. 😀 If the logistics do not work out, you’ll just have to learn on your own and maybe waste a stick or two of conduit. It’s pretty cheap right now for 1/2″ conduit.
Here is the Dog House Frame pretty close to finished. You can see the rivets holding the bimini fittings to the uprights and I am assuming you understand how bimini fittings work. If not, ask questions and I will answer them and type more later in an update. 🙂 I used slide jaw bases and inserts for the pipe.


As you can see the frame is made from 1/2″ conduit and joined together with Bimini fittings. The front is slid into the 90 degree rod holders, drilled 5″ back from the star for the regular rod holder spot. This is done so that Kako has room to jump out behind me and she kennels in from the back where the shoreline is and room in the tankwell for her to step in and you can read about the tankwell setup here. I added the pool noodle so it would float and the bimini fittings where placed so it could fold flat for transport and storage. Look below as I tested it in the pool and you can see how it folds up as you will not be able to tell later on.


Now for something in the build that did not work out as planned. As I was out in the garage figuring how to attach this Dog House to the kayak and I wanted to go with a No Drill setup, so if I change it later on I do not have holes in the kayak. I had bought some 1/2″ conduit couplings as I thought I might need to joins some pieces. I did not need to join any but while looking at a coupling I got an idea. I cut off one side, just under the stop area for the conduit in the middle and ground all away except for screw part that bites into the EMT conduit. I removed the screws and ran an 8-32 1″ bolt through the bungee anchor on the Ride 135. I thought this was great and patted myself on the back for a while as I was unaware of the splendid failure that was too come.

Later on, I took this setup out on the river with Kako to make her Kennel in the Dog House and see how it all works. She did great kenneling and jumping out, but my little 55# Bull comes on like a freight train most times. I told her to “kennel up” the third time and she banged the frame really hard on the left side. No harm to her, but upon breaking the Dog House down I noticed the left Conduit coupling sheared off at the cut mark. So, I experienced my first prototype failure, but we will continue and fix this later.
Here is Kako modeling the Dog house for fit for me. This is how she fits in it. You can see the back of her rear legs are less than 2/3’s of the way back, so she has plenty of room. I wanted this as I know she will lay down while hunting and boredom sets in. Then when she hears birds she will jump up and can stick her head out and make very little motion. You will see her later with raffia on the Dog House and see much less of her.
Now to attach the blind better I needed to pull the front down to keep it in the rod holders when and after she jumps out. I bent some S hooks closed on one end and bent the other end 90 degrees out to catch the bungee on the tank well. I am assuming your read the tankwell post. Once the blind is in I pull the bungee up on each side and hook on the S hooks that are attached to the bimini screw head bolts.

I also found out quickly the rod holders allow the Dog house to wobble forward and back a lot! This is not a good thing as the Little Bull will likely break it if I leave any play in the system. I had some 1″ webbing and clips from another project. I cut a short piece and sewed a loop on the end that can slip on the rudder post and sewed the female end of the clip to the other end. Then the long end I again sewed a loop on one end that can slide over 1/2″ conduit and over a bimini fittings. I unbolted the side connection and slid it over and put it back together. This snugs the Dog house very tightly to the kayak and makes it secure.

The last part not really shown is the cover for the Dog House. It is Cordura that i used on my Boat blind and on the Commander kayak blind, but this time I did not want to sew the entire thing. I also figured this Dog House was WAY PAST my sewing skills. I wanted Kako to be able to be out of the rain, So I sewed a sheet that could cover the Dog House. It is all sewed around the edges and zip tied to the risers, but only below the bimini fittings. Any ties above the bimini fittings and the frame will not fold up. I burnt holes in the Cordura with a hot rod to zip tie it to the frame in two spots on each leg. Also not shown I burnt two holes at the front and back of the top. I attached a bungee to the front with and S hook and a Zip tie on the back for a loop. The S hook from the front hooks the loop in the back and pulls the top tight. I did this so when it rains while hunting water will not pool on top f the Dog House. I do not have a picture of this, but if you need more explanation, comment and I will add more content.
Now for the layout back rest. Since we are hunting Resident geese which can get pretty shore and decoy shy, I like to make everything as low profile as I can. I did not want to sit in the Ride 135 with my Torso sticking straight up. So I pulled out the old back rest I had made for the Commander that I had never used. This seat just had several problems, as there was not captains perch to lean it back on, its was a bit wide for the inside of the ride and other things. I ended up just salvaging the cover, PFD and bimini fittings and re-bent new conduit to make a new frame.
 As you can see with the finished frame, the bottom piece has a slight saddle bent so that the side bars can sit on the bottom of the kayak and the saddle raises over the raised section in the ride for the seat. The back rest bar is wider at the bottom than at the top. All bimini slide jaw fittings are mounted on the conduit and these are the 3/4″ ones. They are a little loose but tighten up once riveted. The bottom of the back rest and both ends of the brace bar have 3/4″ bimini inserts. They are drilled with a small screw to keep them from getting lost, except for the bottom insert on the brace bar. This is so the chair can be folded by popping the bottom of the brace bar loose.
The PFD was a cheap old one I had as an extra and it makes a back and butt pad, plus it can float the entire thing is a bonus. The bottom of the back was bent over the bar and loop stitched to make it stay on the bar and be a head pad on the top of the back rest. I also sewed the front opening, the lower end, together so it acts as one piece. The next step was to make the backrest a solid thing to lean against.

So, I dug out some extra 2″ webbing I had from another project. Never, throw stuff away, especially when you’re a tinkerer, as I am. You will always find a use for the leftovers from other projects. You just get more Tupperware containers for the garage attic and stick them up there, so that you do not appear, to be a hoarder. 😀 I got zip screws, the ones with the small drill bit on the tip, some washers with neoprene on them and got ready to attach the straps. I cut the straps so I would have three places for my weight of my back to rest on. One above the Bimini fittings and two below. I tired it without the straps and it out right sucked and was not even a backrest! So, to get the straps ready I heated a rod and burnt two holes for the screws in the straps. Then drilled one side in to secure the one side. I then burnt two more holes in the opposite side and got ready tighten the last side. The free end of the strap was locked with vise locks so I could pull hard when I drilled the screw and washer into place in two spots. I made sure the straps where tight and loosen and repeated if I had too so they were tight. Below shows how I pulled the straps tight.

So, I already had a cover sewed for the back rest that slide down the back and had a pocket for the butt pad to slide into. It was not made for the brace bar spots, so out came the hot rod again and I burnt two openings in the Cordura so the brace bar bimini fittings could be put through the fabric. The side of the brace bar you see has the bimini insert screw in and is bolted to the slide jaw. The bottom is the same except the insert is not screwed so the brace bar can pop loose and let the backrest fold.

Here is the back rest in use with me resting on it. It will be all fluffy with raffia on the Dog House and I should make a slow taper to the front of the kayak.

The next part is the gun rest. In the Commander I used a dashboard to pull the front of the blind tight. I decided to use all netting on this blind and not Cordura, mostly because I did not feel like sewing it or buying all the webbing and I had lots of left over netting. I had Scotty rod holders on the slide trax that I use for trolling in striper season, this is how they are mounted. I have them pushed up in the spring for fishing and pull them back on the Trax for hunting. 1/2″ conduit is a little loose for the Scotty bases, but I do not have a 3/4″ bender so I just went with 1/2″ and once the net is pulling it forward it’s tight in the bases.
 I bent one 90 degree bend and then bent a saddle shortly after it. Then pushed the right end up against the wall and measured the difference of the Scotty insert holes across the kayak. Then I subtracted 5″ for the conduit bender take out and marked that distance from the wall on the pipe. Then you put the conduit in the bender and line the arrow to the mark you just made and bend another 90 degree bend. Then you just cut the conduit off at the correct length and it is finished. 1/2″ conduit is under $3 for a 10′ stick right now at Lowes. If you make a mistake there is more available. I then wrapped the area you see in black with friction tape, used by electrician to wrap service cables and wires that may move just from current use or near rough opening to protect the cable jacket. Then I covered it with regular electrical tape to hold the friction tape still. Friction tape is hard but slightly spongy and just acts like a buffer keeps the bars from chipping the paint on my MP-153 custom camo job. How do you like the hand painted camo? I have not wrote that on the blog yet and my daughter might want the Mossberg 500 painted.
From before when I wrote how the conduit couplings were not going to to work. After a little think thinking of what would slide into conduit I saw the back rest and bimini fittings and thought “What, … am I dense?”. (here is where my buddy Greg, and my Wife, are shaking their heads up and down in a agreement.) 😀 I grabbed two inserts and they lined right up with the bungee fitting on the Ride. I unscrewed the bungee fittings to loose it and compare it and use a 1/4″ bolt to bolt the bimini fittings to the bungee connector. The bimini fitting insert was just a bit wide and blocked the bungee connection from seating correctly so I sanded enough off one side a little bit so it would rest in the spot. Then a little lock-tite on the threads and put it together. Bam, .. Success! This was a three beer success story, which of course, halted all work for the day as I regaled in my accomplishments. You have to take breaks and let all that success sink in some times. 🙂

The dog house slides right on in the back and below you can see how it mounts. It is a little tight but a little push on and off and it works good and kako cannot pop it off and it holds tight so far.

Now, that everything else is set and working it is time to put the netting on the blind and start grassing it. Below is all the netting. It might be hard to see the fine net, as it looks like just a shading on this picture. I can include a larger picture if anyone is confused, but wanted to limit my bandwidth a bit as there is only 23 pics on this.

Below is how the net hooks on to the bow of the ride. It grabs the bow and is pulled back to the gun rest. The netting is zip tied in many places on the bow and on the gun rest with 8″ zip ties to prevent it from sliding side to side. It is not much grabbing the bow but you don’t want it in the water if you have to paddle out to get a bird. Water splashed up high on the bow and any raffia in the water slows you down, a lot! This is left over net from the kids trampoline that fell apart and they out grew. I saved it years ago as I knew I would have a use for it.

Next, Netting is draped over the Dog House and zip tied at the 4 tie holes on each side for the Cordura cover. It was actually two pieces and I sewed with a hand stitch across the top on the middle to join them. This made the doors work. The doors do not need to cover the entire area of hang down very far as the raffia will fill it in and hang down. Plus, once Kako is in there her head and neck pushes it all to the side. This fine netting is left over scraps from a Cabelas boat blind I had many years ago. I would best describe it as a type of nylon minnow netting.

Below you can see long pieces that extend off the Dog House that are used to cover the back of the kayak and over the rudder. The two pieces that extend back and are tip tied in various places to sure them up to act like once piece. This also clearly slows the strap I added to the back of the dog house. A little tan spray paint dusting and it hides the strap once camo is applied.
 I also sewed in a small clip to each side of the tail piece extending back over the rudder. I have had problems with these loose piece in the wind before and I can guarantee without this Kako would be pulling that entire tail piece into the Dog House while hunting and I would have to get out and readjust the blind many times from her getting into the kennel.

I also took some of the fine netting and loop stitched it on to the back and sides of the back rest. At first I was going to extend the sides from the dog house to the side handle to cover the middle sections. That was going to cause a problem on my left as the paddle keeper would be covered by a tightened piece and not hide the paddle. It also was not going to break up the seat and blind bag storage area. This actually covers the best and brings the raffia right up to my head and jacket.

Here was during the grassing process with the raffia, we took a break and had Kako kennel up into the Dog House. She is in there and sticking out like she would to watch birds work the decoys. You can see that Kako was wearing a pink bandana that the blind effectively hides very well, so camo is not a worry for the dog. I still had some holes to fill in if you look close enough. Not that the birds were likely not notice, it just makes me feel that it is finished.

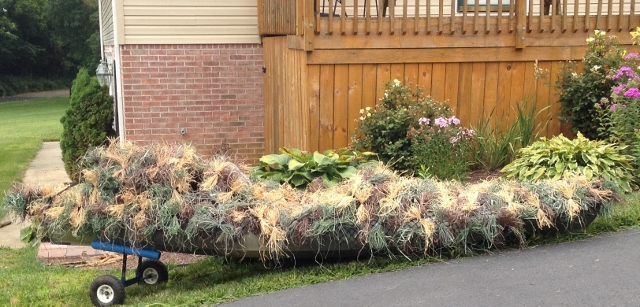
Here is the finished blind wheeled out of the garage to get better light on it.
As the Hunting season progresses, I will try and get some pictures added of it on the water and in use.

So have you had a chance to go duck hunting yet? How did the new blind work out for you? Do you have any pics of it in action?
LikeLike
Yes, I have used it and it works pretty good. To do it over, I would have used small netting on the front as I did on the back, but I had that extra laying around. The gun rest bar gets tangled in the large holes, but it easily pulled out.

I do not have any pictures in action of use. Maybe next time I am out I will get my buddy to take a few pictures. Here is a facebook picture of the blind folded up leaning against the decoy bag coming back in from a hunt. Not sure if WordPress lest o post pics in a comment.
LikeLike
Thats Great!!! I made a blind on mine, but yours is freaking great. im going to attempt to build that seat you made. i just finished going through your blog and really enjoy it. thanks for all the ideas.
LikeLiked by 1 person
How do like hunting from the Ride 135? Ive been thinking about getting a kayak for duck hunting. How do you like the Ride compared to the commander and the canoe? Thanks for sharing!
LikeLike
I like hunting from both the Ride and the Commander, but I would have to say the Commander is my favorite for hunting. You can lay down mostly inside the commander and you are more exposed to the wind in the ride. A little bit when it will be like 13 degrees tomorrow makes a difference.
The Ride is best for rougher water areas and its my open water fishing kayak also. Its also best for the dog tagging along as she can bring a lot of water in the Commander that will not drain out like it does in the Ride.
The Canoe does not compare at all for stability or single man usage. The kayaks are so much better. Its only benefit was the ability to pack more weight.
LikeLike
Rob, As someone who hunts from paddle craft with a dog, I appreciate you ingenuity. I use to try to get my dogs to sit on foam, but they don’t like sitting in the water that collects on it . I now use loose straw over marsh grass zip tied to a hardware cloth and 2×2 frame. This goes in a plastic cement mixing tub. I like how the grass/straw wicks and insulates. The tub may be too big for your boat, but you could build something similar with lauan and fiberglass it. Another option for a pad would be the rubber grid mats that are made to cushion concrete floors for livestock. They would be comfortable and drain well.
LikeLike